Pixinsight Image Annotation
It’s always easy to see the object you chose to image on your screen but there is always so much more than meets the eye. Maybe you see a fuzzy dot or you just don’t know the name of an object. Annotating the image will tell you what you want to know. Annotating is an easy 2 step process once you’ve processed your image. Annotating utilizes the Script menu in Pixinsight.
The first thing you need to do is Process your image in Pixinsight. You can annotate your linear image however as you can see below without a stretch there really is nothing to see.

Once you have your image processed the first thing you need to do is plate solve your image using the Image Solver Script. This will apply the plate solve to the image so the annotation script knows the coordinates of your image. If you try to annotate the image without the Image Solver you will get a WCS Coordinates Error.

When you open the Image Solver script you will see an area called Image Parameters. This is where the coordinates go to help the solver plate solve the image. If the RA and DEC is in the fits header then it should automatically load. If it doesn’t load or if you have an image missing the fits header data click on the magnifying glass icon. When you click the icon a search window will open called the Online Coordinate Search. In the image identifier field type in the name of your object or one of the main objects and click the magnifying glass. Once you do that an object name or a group of names will appear. Click on the one you searched for and click ok. This should enter the Coordinates into the Image Parameters area of the Image solver Window. Next click OK and the process console will open and solve. When its solved you should see in the process console window green writing stating something similar to:
* Reached maximum number of iterations without further improvement.
* Image solved with a score of 298.47

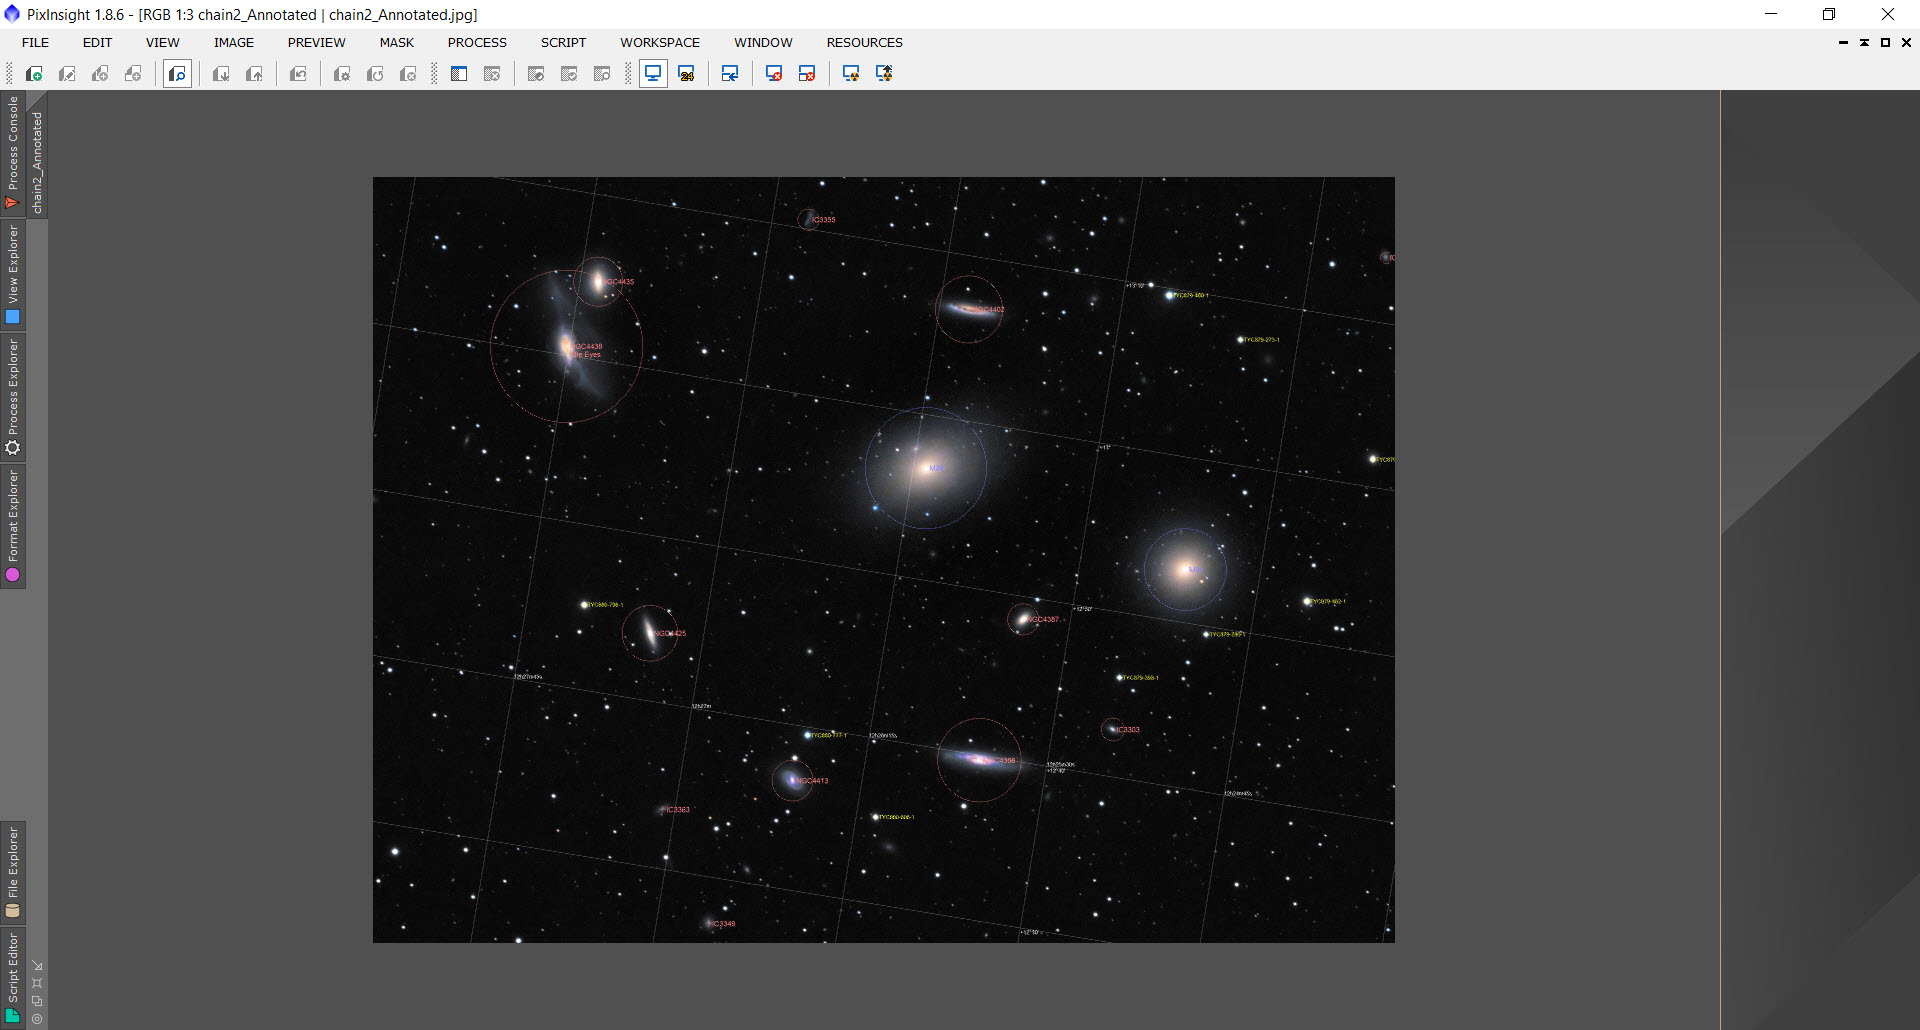
Now that the image is solved its time to annotate the image. Go back to the script menu but this time select the Render option and then click AnnotateImage.

Once you annotate the image you will have an image like below. If the image is to busy for you then you can go back and uncheck some of the Layers and reprocess so there is less notations in the image.

One error/warning you may come by when trying to Image solve is the following:
You have not specified an actual observation date, and we cannot retrieve it from existing image metadata. The computed astrometric solution may not be valid as a result of inaccurate star proper motions.
Do you want to continue anyway?
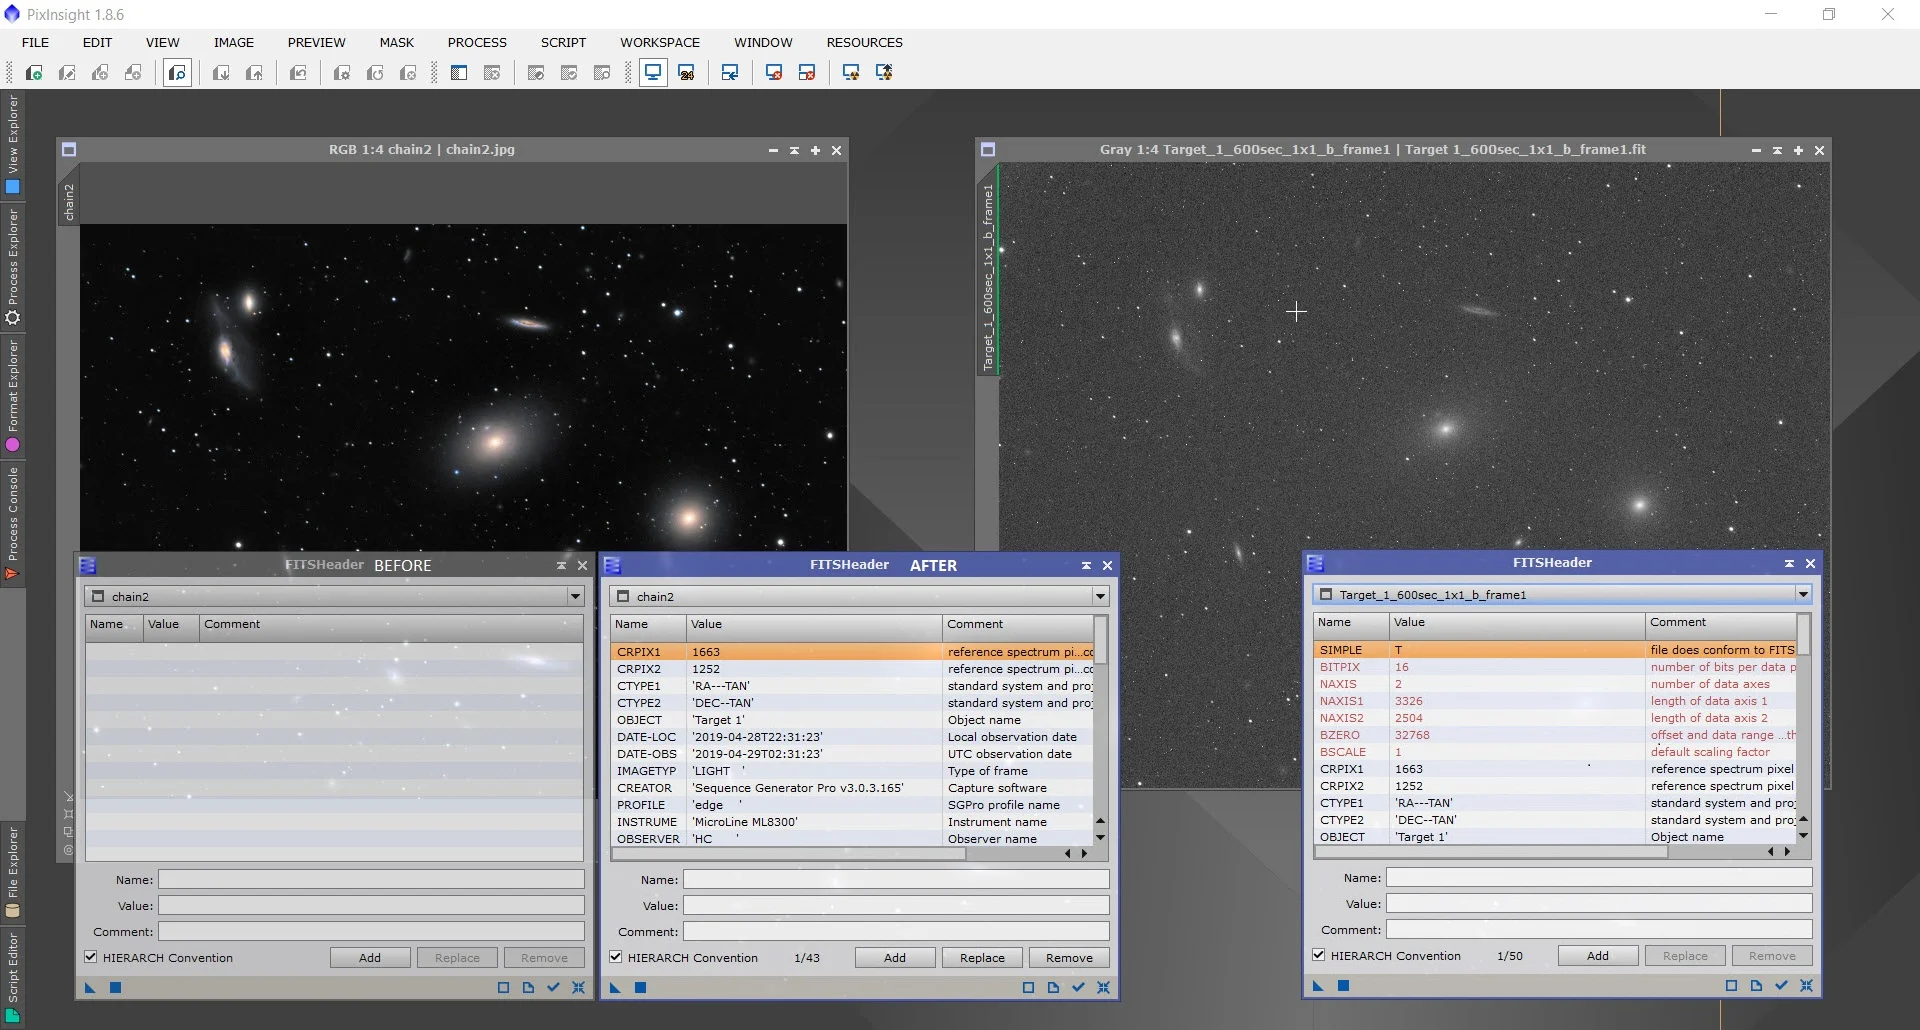
This happens when your image has no Fits Header data. You can lose the Fits Header if you export your image and post process it in another program such as Photoshop. Now your image can potentially solve without the fits header however it can fail.
There is a simple fix to your lost Fits Header Data. What you want to do is open up any of your non processed linear images. Then you want to click on the File Menu and click the Fits Header option. When you do this a Fits Header data window will open up. You will notice the familiar Apply arrow at the bottom left of the window. Simply apply the Fits Header to the Processed image and now your image with no Fits Data will have a copy from the Linear Image. If you shoot with a mono camera it doesnt matter which filter image you open or if you changed the Geometry of the processed image. You are basically just giving the image coordinates for the Image Solver to use when it plate solves. Now that you applied the Fits Header just Image solve and Annotate.
That is the Image Annotation process. Again its a great tool to see what else you’ve captured that you didn’t even know was there. Check out our other Pixinsight tutorials. (FIX LINK)