Astro Pixel Processor Tutorial & Review
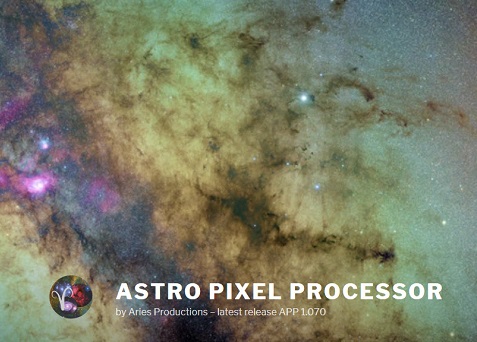
Astro Pixel Processor is a fairly newly released Astro processing program. The program offers a fairly easy means to process your images with a nice set of tools and sliders to make quick and easy adjustments. The program basically goes step by step through numbered tabs so you don’t have to guess what to do next.
Astro Pixel Processor - Download
The cost of APP is 125 Euros for the current version without an expiration date or you could “rent” the program for 365 days for only 50 Euros upon which the program will stop working unless you re-rent the license. If there is a major update then you will need to pay an upgrade fee similar to what Maxim DL does. I dont know if you purchase the software within a year of a major update if they will allow those people to upgrade for free.
There are many video tutorials and PDF slide presentations on the program but I couldn’t find any written versions for a step by step process. I know I like to have tutorials up on one screen while I process on another so its easy to follow. So this tutorial should help you get through the basic setup and usage of APP.
When you launch APP you will see the main program window launch as well as a process console. The console should minimize itself and if not you can minimize it as most processes display in the program itself. Upon launch you will also be asked to select a working directory. This is where APP will store and save all registered, calibrated and combined images. I recommend setting up a new folder in your lights folder so your data is all in the same place, but you can select or create any folder.

After you select your directory you have a set of 8 tabs under the button that states your directory. These will be the main tabs for your processing. The tabs are 0) Raw/Fits 1) Load 2) Calibrate 3) Analyze stars 4) Register 5) Normalize 6) Integrate 9) Tools. Its very easy to follow each tab being the next step in the process. Its also important to note you can adjust how adjust how much RAM memory you want APP to use.

The load tab is where you will load all your files from Lights to calibration. There are different check marks to select multi-channel, multi session, etc. If you hover over each selection it will give you a detailed description of what each selection will do. Multi channel is mainly for Mono cameras. When you select multi channel you will add each file sets per color channel and APP will pop up a window asking what filter the set belongs to


Once you have everything loaded the files will all appear with check boxes in the bottom window of the screen. Here you can toggle files and new processed files will appear there as well when stacked, registered or integrated. Be warned as APP finishes a process or step you will be greeted with a LOUD Gong so lower your volume if needed but great if you want to walk away from your computer while processes run and you want to know when its complete:

Once everything is loaded move on to the calibration tab. Here you choose the integration method for your calibration data, you can create rejection maps, create masters. There are several options at the bottom of the tabs menu to look at such as align channels, split channels and remove light pollution. When you have everything selected you can click save calibrated frames and the process will run

The next tab is analyze stars. This will accept or reject images based on the FWHM of your data. There will be a min/max value. If you fall out of those values the sub will be rejected. Some people have had issues with errors here and that’s probably because the focus was not optimal and you may have to adjust your values for them to be accepted. You can watch the process and see the min/max values of each image that’s calculated. Depending on how many files you have this process can take some time. You MUST run this process if you want to select a reference image during the registering process.


The fifth Tab but labeled 4 is the registration tab. This will register your images to your set reference image. You must run Analyze star to set your reference. When you click select reference you will go to the list of files below and double click on your reference. Note if you have binned subs you will want to select an unbinned file so the program will scale the binned files appropriately. Most of the tabs here can remain default however if you are trying to process a mosaic you will need to change the registration mode to mosaic. When you are done click the save registered frames and the process will run.


The next tab is the Normalize tab. Anything that may fail during a process will appear in red in the bottom of the screen. If there are failures APP will give you suggestions to fix the issue. You can fix failed normalized files by increasing the kappa value in analyze star, run analyze star and then rerun normalize.

The next tab is the integration tab. Here you will finally integrate your files. Here you will select Multi-Channel options, Multi- Session options, Weights for your lights, outliner rejections such as sigma clip and you can even create drizzle data. I recommend integrating 1 channel at a time and renaming that channel after the process. The names given to files dont indicate the filter, like in Pixinsight, so make sure to name it. If you have files that failed normalization they will not be able to be integrated until you fix the failure. You can go back and fix the files needing to be fixed by deselecting all the other files and then running the processes.


The last tab is the tools tab. Here you will combine your files and apply corrections. we will go through each tab but I will go into detail on the ones you will probably use the most.

The first tool to run is the Remove Light Pollution. Run this on individual channels prior to combining. The tool is very simple. You load a sub and see where the gradient is. Use your mouse to click and draw squares on each side of the gradient going around the image. Once you have the edges of the gradient covered on each side you want to place a few more boxes inside the gradient area. This will help APP create a proper correction model to subtract from the image. Once you have the boxes complete click Calculate and watch the gradient disappear from your image. You will want to do this for each channel before combining.

** NOTE THE VIGNETTING TOOL is the similar to the Light pollution tool. You would make boxes around the Vignetting area, calculate and save. Since my Image doesn’t have this problem the tool will distort the.
The next tool is the rotation tool. Here you can adjust the rotation and size of the image. You have a button you can click to change from clockwise to counter-clockwise and sliders for the degree of rotation you want. As you adjust the sliders you can click the show button in order to see the changes. and once you are happy with them you click OK. I think they should have the rotation and crop tool together to make rotation and crop adjustments easier.

The next tool you can use is the batch modify tool. This tool you can use to batch modify files for cropping, changing offsets and has settings for images taken with DSLR’s. The crop tool is fairly easy to use. You draw a box around the area you want to crop and click the crop ok button.


The next step would be to combine your channels. The other tools such as star calibration, background calibration, HSL Selective color all require an RGB image to use. In the RGB Window you first click ADD and select the files you want to combine. After you select the files you will get a window that confirms the color of each filter. If the color is wrong or the select box says custom make sure to change the information to the correct filter. Once everything loads you will get a window with a bunch of sliders for each channel. Here you can adjust the percentage applied by each channel. If you do make adjustments you need to press calculate again to see them take effect. Once you have completed your stack and adjustments click create to save the image. When you save it will ask you to name the image.

Now that you have your linear image its time to use the calibrate tools. The first calibrate tool I run is the calibrate background. You will select squares around the background and away from your main target. Once you have a good set of squares you can clock calculate.


The next step would be the calibrate star color. Again you make squares around your stars and click calculate. You can adjust rejection and increase colors. The correction will also do a sort of color correction. You can see the correction model when the process is done. Once you are happy with the adjustment click Ok & Save.

The next step is to take your calibrated image and make your typical adjustments to it. You can adjust saturation, brightness, contrast, sharpness and more. There is a red ? box that will describe the functions of all the sliders with a detailed picture reference for the adjustments. Once you are done adjusting your image you can click save. The save feature allows you to save in FITS, TIFF and JPEG. If you select the TIFF file it allows you to select the bits you wish to save it in and if you save a JPEG it allows you to choose the quality of the JPEG.

Here is a quick process of the Sculptor Galaxy I did while doing this tutorial. I think it did a great job and really didn’t take long to do it.

PRO’s:
The cost is half the price of Pixinsight and offers a great post processed image.
Many of the tools and steps provide pop up window instructions for ease of use and suggestions of fixes upon errors.
Any license (Trial, Renter, Owner) can be activated and used at any time on 3 separate computers, independent of Operating System. You can de-activate, activated computers from within the application.
CON’s:
When a new major version comes out there will be additional costs, Similar to Maxim DL. There is no published cost for upgrades or how often they would happen. I only list this as a Con since I don’t know how it will affect people who just purchased the program or are within the first year of their purchase. We will have to wait and see. Being that at the time of publication the program is at version 1.07, it may be sometime before we hit the 2.0 upgrade.
No undo/redo button or shortcut to see the differences. APP does save each step but you would have to go to the file menu at the bottom and load the images one at a time to see the changes. This is somewhat inconvenient and I think an easy fix for a future update.
Just like Pixinsight you will spend some quality time watching videos on the finer aspects of APP and learning all the tweaks and adjustments you can make to finish your image. If you download the trial and like it I definitely think its worth trying out for at least a year and getting the hang of it or just buying the full version. Its another great tool in your astro toolbox. The program is fairly intuitive and I rarely had to look up how to do something. I would hands down recommend this program for beginners in the field to help them get nicely processed images with ease as well as to advanced imagers. The program may not do everything Pixinsight does but it certainly does what you need to get a quality image.
VIDEO TUTORIAL - For additional tutorials click the link for video tutorials